Yep. I’m one of the lucky ones that happened to have a decent home gym setup pre-quarantine. This is due in part to the fact that I’m a homebody, and sometimes I just don’t have it in me to be in public making my “oh my god I think I’m gonna die” face.
Setting up a home gym in a tiny bedroom of an upstairs apartment with low ceilings proved to be an interesting challenge, but I’ve found ways to make it work. Well… mostly work. Despite these somewhat limiting surroundings I’ve been able to squat, bench, deadlift and perform probably about 80% of the exercises I would typically do in the gym. That being said, a lot of the exercises I do in the gym I do because I can do them; not because they are “better” exercises. Sure, there are a few that would be nice to do at home (leg extensions come to mind), but I have all the necessary equipment to get in a great workout with sufficient variety.
Over the next several posts, I’ll outline what I have in my home gym, why I have it, what I like about it, what I don’t like about it, why I bought it, and any other random tidbits that come to mind. I hope that this helps spark some ideas for how to make things work in your own space.
Today I’ll focus on what happens outside of the official lair. This is the overflow, or “pre-gym” space if you will.
The Deadlift “Platform“
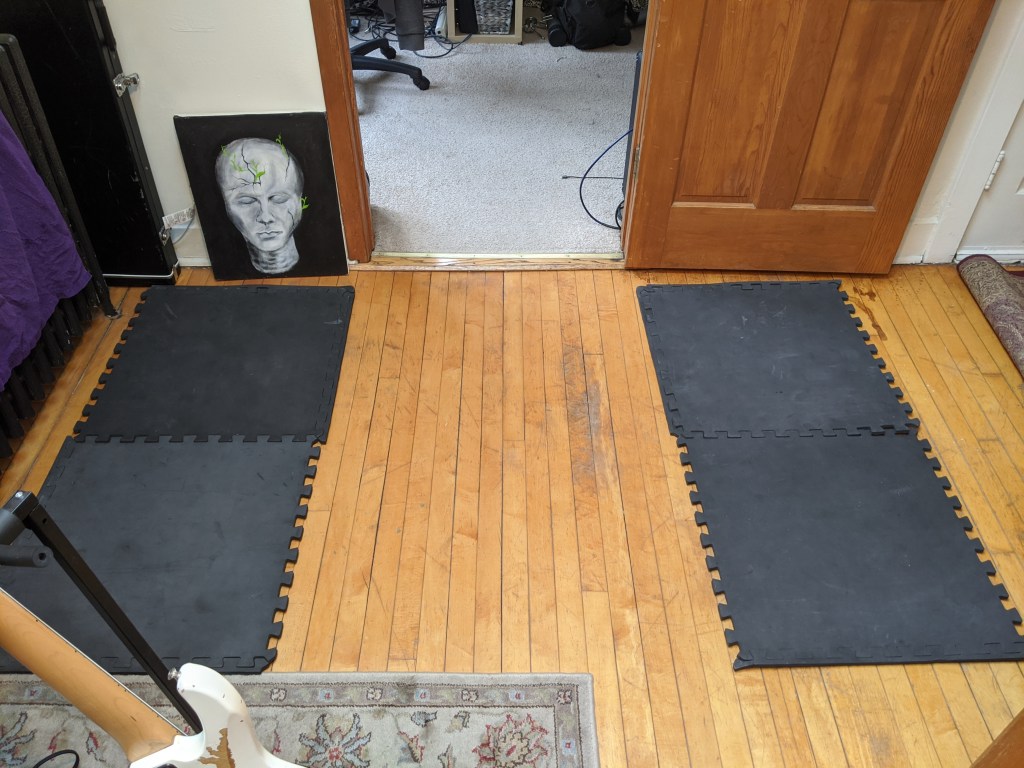
In case you didn’t already know, deadlifting on carpet sucks. Having something squishy under your feet doesn’t really lend itself well to pulling heavy weights off the floor.
I bought a case of these interlocking gym floor squares off of Amazon a while back and they work in a pinch. They effectively accomplish two goals:
1) Preventing damage to the floor (and hopefully helping me keep my security deposit) and
2) Keeping the downstairs neighbors from filing a noise complaint.
I like that they are cheap and allow me to deadlift on hardwood floors. What I don’t like is that the “interlocking” feature isn’t perfect and the squares sometimes tend to pull apart. This could probably be solved by adding a little duct tape on the bottom. Since I’m in a rental space and plan to move to a house in a year or so, I didn’t feel it was wise to invest in more expensive gym flooring.
The Saving Grace… Skylights!

Standing overhead press is a “must do” movement for me. Given the low ceilings in our apartment, standing barbell overhead presses are out. The skylights allow me to at least press dumbbells over my head, which is better than nothing. Because the standing barbell press is such an important movement to me, the low ceilings have proven to be the biggest limitation of the space. On top of that, the configuration of my current bench and rack don’t allow for seated military barbell presses either. On the bright side, if it weren’t for these sky lights I wouldn’t be able to do any form of standing over head press. Crisis averted!
The “Clutch”
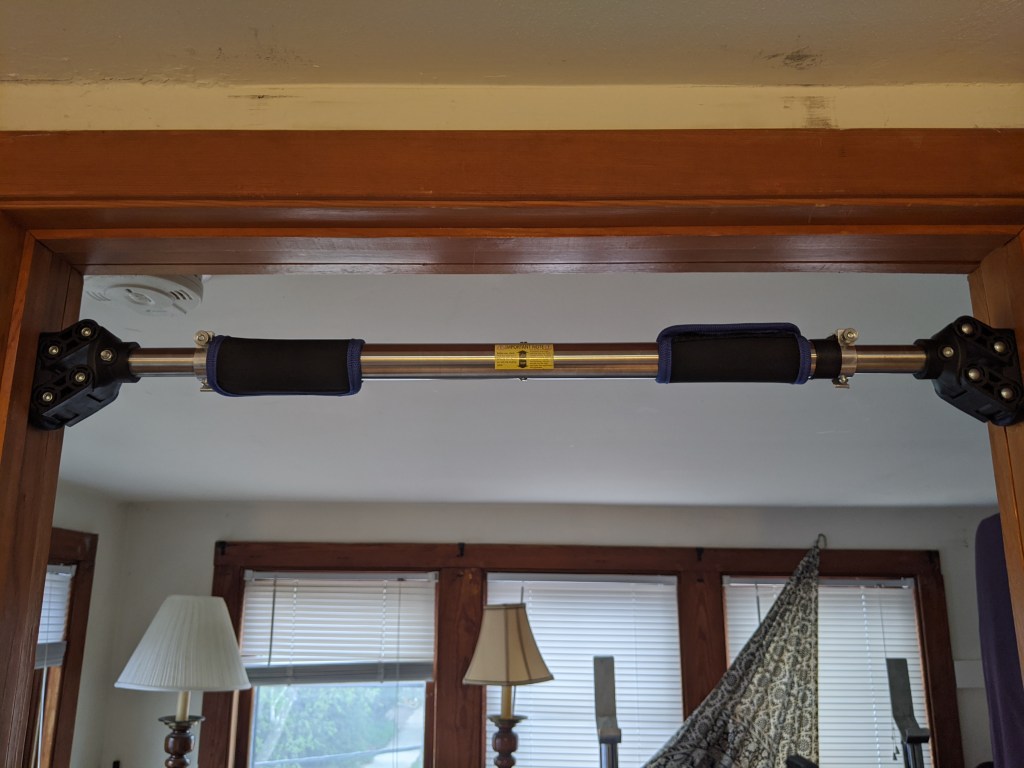
What can I say? It’s a pull up bar.
As I’m sure scores of calisthenics athletes would agree, if I had no other piece of equipment besides a pull up bar, I could probably get by just fine.
So why this pull up bar? Here again, there were a few limitations of the space that I needed to work around. The low ceilings didn’t allow for a hanging door frame pull-up bar, and because it’s a rental unit I didn’t want to drill into the door frame or the ceiling.
I was initially very dubious of buying a pull-up bar that relies solely on tension to keep the bar in place, but after installing it I’ve got to say…this thing isn’t going anywhere. It’s a pretty ingenious design that pushes harder into the door frame as you pull down. Apparently, this bar is rated to hold 400 lbs. Having felt how solid this thing feels, I believe it. I don’t plan on testing it but I also don’t foresee myself doing pull ups with over 200 lb. hanging between my legs in my lifetime (and hopefully not gaining a couple hundred pounds either!)
What do I like about it? Mostly, the fact that it allows me to do pull ups. It also allows me to attach resistance bands and my Spuc Inc Econo Lat Pulley system. This greatly increased my exercise options, which is another reason why this piece is so critical.
What I don’t like is that due to my door frame being narrow I can’t comfortably use a wider grip. You can see in the photo that there are two adjustable fabric/foam pieces for gripping the bar, but they don’t fit outside the brackets. I usually grip the bar outside the brackets on top of the black plastic part that wedges against the door frame. The problem is that there isn’t enough space for me to comfortably grab the bar so the brackets tend to dig in to my hands a bit. The bar does extend out to accommodate wider door frames, so it’s not’s really a limitation of the bar itself.
Well that’s about it for what happens outside of my official workout space. I’ve been very intentional about keeping my workout gear out of the main living area to reduce visual clutter. Most of my exercises can be in the confines of my roughly 8’x10′ bedroom and all of the gear itself is contained within.
In my next post I’ll dive into into the depths and show you where the real work gets done. (Ok I think I’ve been watching too much National Geographic…)
Until next time, stay safe, happy, and healthy!
